Posted on Leave a comment

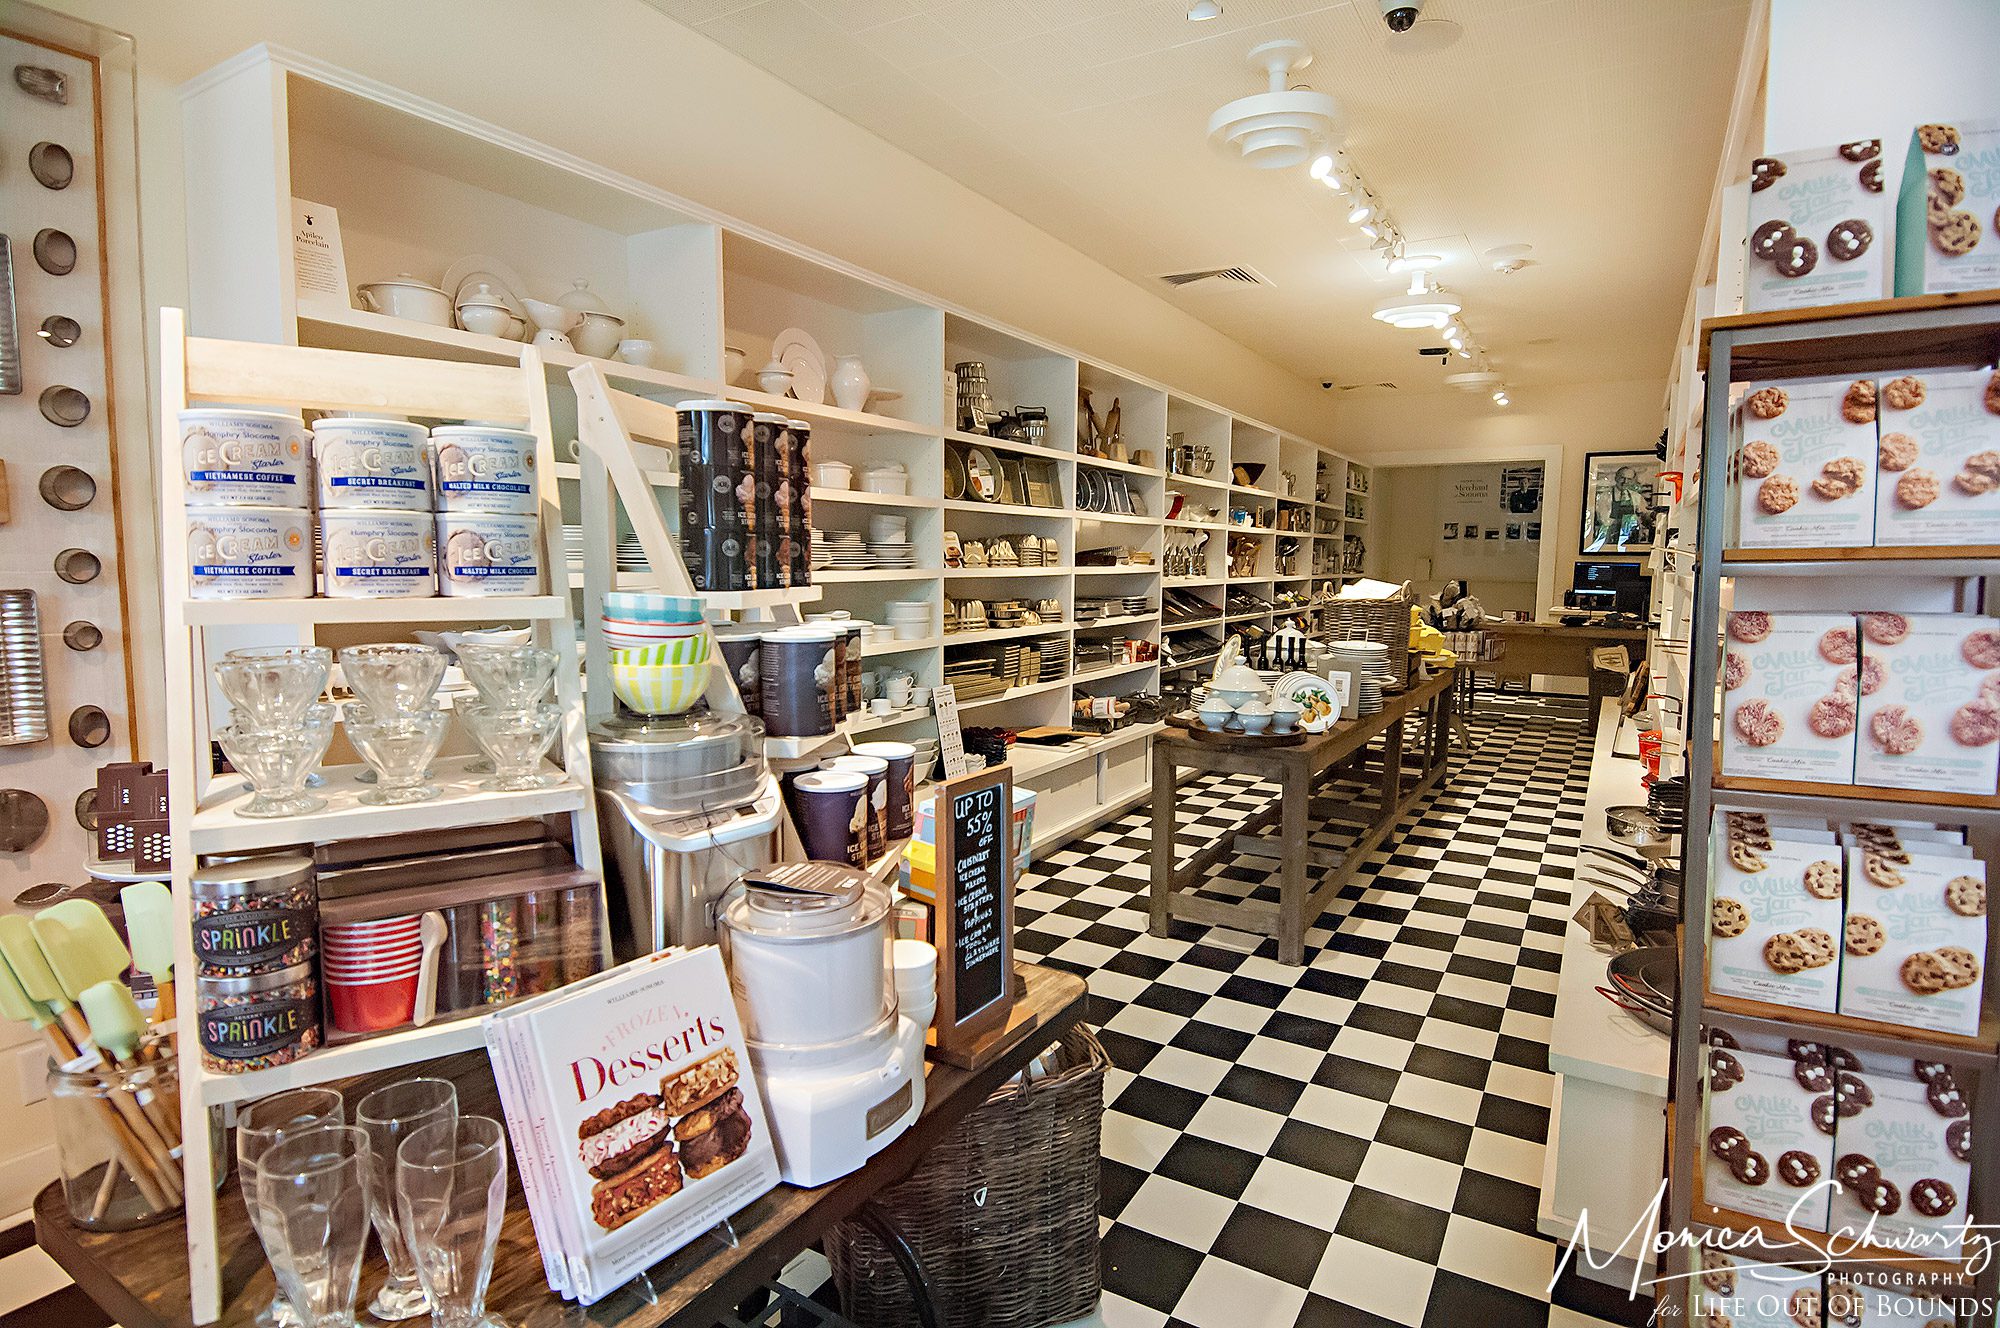
How to design and build a store fixture: Design, Prototype, Test rollout, Final rollout

Design

Designing fixtures for your retail stores takes planning and testing to ensure they meet your needs. Here are the key stages to take a fixture from concept all the way to installation:


Design

Start with sketching conceptual designs and making scale models of your ideas using basic materials. Consider factors like functionality, longevity, brand image, assembly/disassembly, and costs. Refine your favorite concepts into detailed technical drawings.


Prototype

Build high-fidelity prototypes of your top designs using the actual planned materials. This allows you to gauge assembly difficulty, test durability and stability, and get early feedback. Make sure to photograph prototypes from all angles for comparisons later.

Focus Group Testing

With preliminary designs and prototypes complete, conduct focus groups in a mock retail space. Observe shoppers interacting with prototypes and get feedback on aesthetic appeal, usability, and any needed improvements. Revise designs as needed.

Pilot Store Rollout

Select one store to install small numbers of the revised prototypes. This allows real-world testing over time. Observe how fixtures hold up to actual use and get associate feedback. Make final adjustments before wider rollout if time permits. 

Full Rollout

With a proven, tested design, you can confidently mass produce fixtures for installation across your entire chain. Consider logistics of delivery, assembly instructions, and timeline. Provide photos/instructions so consistent installation is achieved store to store.

Keeping fixtures fresh is important – revisit this process every few years to evolve your brand presence through innovative, customer-focused fixture designs.


Jeff Lo is owner and president of TGS Elevate, a certified Minority Owned Company (MBE) that does the work of seven separate vendors – encompassing 2D and 3D design, printing, fabrication, project management, logistics and sourcing – to save clients time and money. TGSE’s minority ownership in printers and fabricators across the country allows control of lead time and pricing. This lower overhead cost gives us the flexibility to find the right production facility and supply chain for your project and gives you one point of contact, from design to installation. 

Want to chat?


Get help from one of our professionals

Posted on Leave a comment

Delivering Value Through Your Vendors

Delivering-value-through-your-vendors

As your business takes on new initiatives, it’s important to carefully vet any vendors you partner with to ensure a successful collaboration and long-term relationship. But how do you know if a new vendor can meet your expectations? Here are a few questions to ask that can help determine if a vendor is capable of delivering on their promises.

Experience and Expertise

Does the vendor have a proven track record of success with similar companies and projects? How long have they been in business, and do they have relevant case studies you can review? Seek out vendors with direct industry experience and well-established expertise in your specific needs. Then do the legwork to ask and call on references, and be specific about understanding their pros and cons.

Compatibility of Values

Your vendors reflect on your business, so their values should align with yours. How do they treat clients and employees? Are their business practices transparent and ethical? There’s a belief in business that a company’s performance, and how they handle the day to day is a reflection of who is in charge. We agree, and consider integrity, authenticity and collaboration to be our core values when partnering with clients.

Team Capabilities

Get to know the team members you’ll be working with directly. What are their qualifications for the job? What hard and soft skills do they have to handle something new? Do they have a growth mindset, or just want to do things the same way? Do they identify problems, create plans, and execute reliably? Should anything go wrong, they’re a crucial part of the fix. A track record of hiring and retaining good talent is important to manage complex, long-term projects.

Realistic Timelines

Be skeptical of any vendor promising impossible deadlines. Be upfront about working collaboratively to set achievable schedules. Create buffer time and guardrails to limit any potential issues. Unforeseen issues do arise, and people are human, so find a partner committed to flexibility when needed.

Processes and Measurable Results

What key metrics will determine project success? Is there a process to back up what is known and identify gaps, or are you relying on trial and error, and worse, tribal knowledge? Is there a contingency plan just in case something falls through the cracks? A good vendor should have proven methods for processes, to prevent future issues. Request proof and updates to this as items come up.

While some vendors may cost more upfront, their experience delivering value through innovative, results-driven solutions and great customer service will save you time and money in the long run.


Jeff Lo is owner and president of TGS Elevate, a certified Minority Owned Company (MBE) that does the work of seven separate vendors – encompassing 2D and 3D design, printing, fabrication, project management, logistics and sourcing – to save clients time and money. TGSE’s minority ownership in printers and fabricators across the country allows control of lead time and pricing. This lower overhead cost gives us the flexibility to find the right production facility and supply chain for your project and gives you one point of contact, from design to installation.

Posted on Leave a comment

Timing is Everything: Managing Risk Through the Project Rollout Process

The trinity of product development

Like nearly everything in life, the trinity of product development revolves around three core choices: speed, quality, and price: pick any two. In this article, we’re focusing specifically on price, and if it’s really an option at all.

Price: lowest is rarely best

Applied to our industry, when brands and retailers spend their time and money with fixture packages (cash wraps, shelving, and various types of displays) in new locations, going with the lowest cost is never really a viable option. Brands have a lot to protect: their values, customer base, look, feel, and recognition among other things. Choosing the lowest priced option as the primary value is the fastest way to throw all that good work out the window. Plus, the direct cost of re-work, indirect cost of lost time, and reality of stress and frustration that comes with it, makes you wonder why you even chose to go with someone on price at all. 

Redefining the importance of price

So if the lowest price option is out, where do you choose from? This is exactly where design and manufacturing interests intersect. However, typically these two important roles are part of separate teams (ex: architect and builder interest in building a home), and syncing vision and real world costs across a variety of materials and techniques is challenging. The sweet spot, we’ve found, is getting the best possible quality at the most you can afford. Our honest opinion: if you can’t afford to do it right, don’t do it.

So if we can’t afford a fixture package, what do we do?

Renderings, shop drawings, materials, and techniques are quite different from printing – software, education, and general career path to name a few. Compared to printing, these specialized skills are more involved in the design process, and it makes more sense to rely on outside fabricators to manage and develop these assets vs. coming up with your own design only to find that it doesn’t scale due to material availability, special machines required, or time. So, if you have architects on staff, you’d be fine to tackle in-house. If not, best to collaborate and lean on outside suppliers to create the final product.

Design for print and store fixture packages are different languages

The ideal output depends on the right input. Wide format printing and store fixture production have different inputs: software, techniques, suppliers and timelines to name a few. Just like with language, you’ll need someone fluent on your team that speaks each language – and if you’re lucky, someone that speaks both. However, what if you don’t have the resources to do this? The manual way is to lean on your vendors’ knowledge. Ask their sales teams to educate you about your options, and do our own research to validate it. While this can be time consuming, it is very effective. Just be clear about your vendor’s billing policies surrounding design services.

Is it even possible to do anything?

The ideal output depends on the right input. Wide format printing and store fixture production have different inputs: software, techniques, suppliers and timelines to name a few. Just like with language, you’ll need someone fluent on your team that speaks each language – and if you’re lucky, someone that speaks both. However, what if you don’t have the resources to do this? The manual way is to lean on your vendors’ knowledge. Ask their sales teams to educate you about your options, and do our own research to validate it. While this can be time consuming, it is very effective. Just be clear about your vendor’s billing policies surrounding design services.

Jeff Lo is owner and president of TGS Elevate, a certified Minority Owned Company (MBE) that does the work of seven separate vendors – encompassing 2D and 3D design, printing, fabrication, project management, logistics and sourcing – to save clients time and money. TGSE’s minority ownership in printers and fabricators across the country allows control of lead time and pricing. This lower overhead cost gives us the flexibility to find the right production facility and supply chain for your project and gives you one point of contact, from design to installation.

Posted on Leave a comment

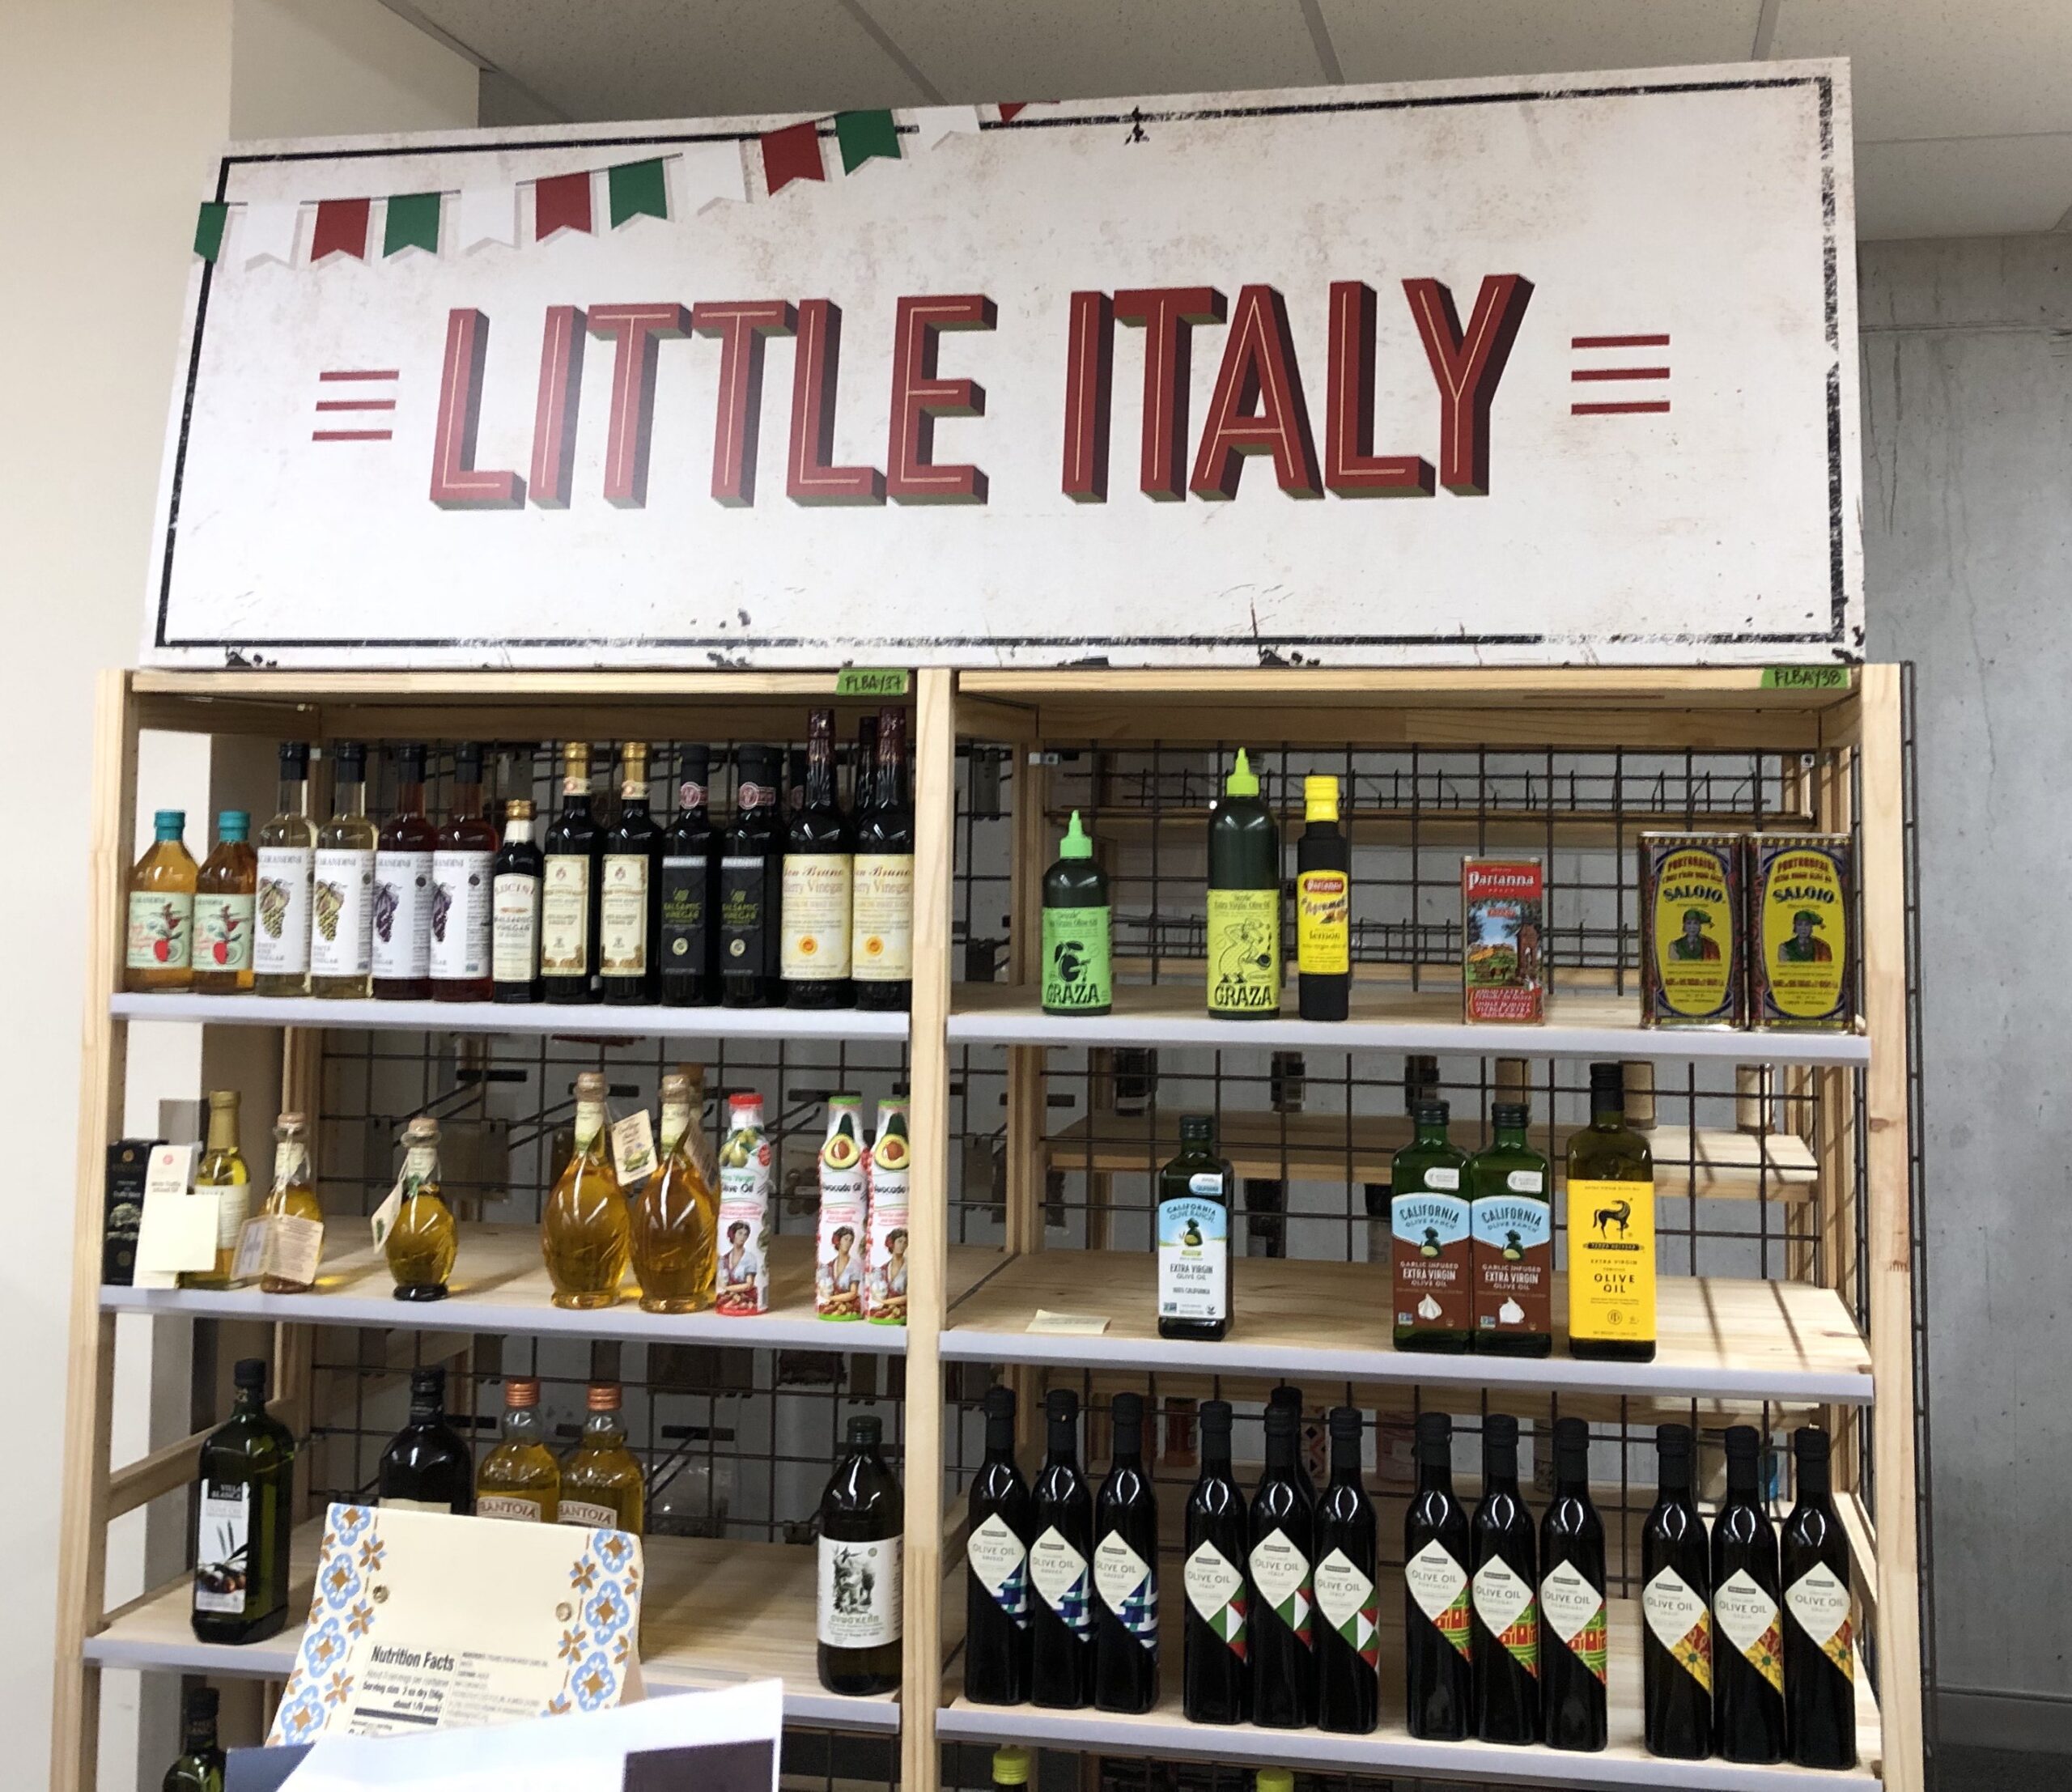
Creating Consistency: Designing the same display for different fixtures (World Market: Little Italy tent)

World Market

In the world of retail, establishing a seamless and engaging shopping environment is of utmost importance. Designing E-flute displays for a variety of fixtures while ensuring consistency across differing materials, shapes, and sizes presents a significant challenge. This article explores the captivating journey of creating a unified E-flute display for diverse fixtures, focusing on a real-world case study set within World Market’s charming Little Italy tent.

The Significance of Consistency in Retail Design

Consistency in retail design transcends merely keeping things visually aligned; it is about forging a seamless and memorable customer experience. A shopper’s journey through a store should be marked by a consistent, cohesive design language that reflects the brand’s ethos, resonates with its target audience, and ultimately fosters loyalty and trust.


The Challenge: Achieving Consistency Across Diverse Fixtures

Crafting an E flute display that adheres to brand standards across an array of fixtures such as tables, shelves, and wall units can be a formidable task. These fixtures come in varying shapes, sizes, and materials, necessitating innovative design solutions to ensure the desired unity.

World Market’s Little Italy tent is a striking example of this challenge. The tent houses an eclectic assortment of fixtures, including wooden tables, metal shelves, and wire racks. The goal here is to create an E-flute display that seamlessly blends with these distinct fixtures while preserving the brand’s unique Italian charm.


Design Principles for Uniformity

  1. Material Selection: The choice of materials is a critical first step. E-flute cardboard was selected for its combination of strength, flexibility, and eco-friendliness. This choice ensures that the displays harmonize with the rustic and natural essence of the fixtures.
  2. Color Palette: Establishing a consistent color palette is vital. In the case of the Little Italy tent, we opted for warm, earthy tones, reminiscent of the Italian countryside. This palette not only complements the diverse fixtures but also aligns with the brand’s identity.
  3. Modular Design: To accommodate different fixture dimensions, a modular design approach is essential. For this project, components were crafted to be easily adjustable to fit various table sizes, shelf lengths, and wall spaces, ensuring uniformity across all displays.
  4. Branding Integration: Consistency demands the seamless integration of branding elements. The E-flute displays for World Market’s Little Italy tent featured the company’s logo, fonts, and style elements to ensure a unified brand experience.


The Implementation Process

Implementing a consistent E flute display design across various fixtures demands effective collaboration and adaptability. It necessitates close cooperation among fixture manufacturers, designers, and store personnel to translate the vision into reality.

In the case of World Market, our team engaged in an iterative process of prototyping and refining the E-flute displays to ensure a perfect fit on different fixtures. Detailed guidelines for store staff on installation and maintenance were provided to ensure the desired consistency throughout the shopping space.


The Outcomes: A Seamless Shopping Experience

The successful realization of a consistent E-flute display for the Little Italy tent at World Market has yielded exceptional results. Shoppers wandering through the tent are now greeted with a unified blend of Italian charm and the brand’s identity, regardless of the fixture they encounter. This cohesiveness resonates with customers, instilling trust, and inspiring them to explore and make purchases.


Conclusion

Designing a uniform E-flute display for diverse fixtures is a blend of art and science. It involves understanding the brand’s essence, the versatility of fixtures, and the power of materials and design principles. When executed effectively, as exemplified by the Little Italy tent at World Market, the results can transform a retail space into an inviting and memorable shopping experience. In a world where consistency is key, the right design choices can make all the difference.


Jeff Lo is owner and president of TGS Elevate, a certified Minority Owned Company (MBE) that does the work of seven separate vendors – encompassing 2D and 3D design, printing, fabrication, project management, logistics and sourcing – to save clients time and money. TGSE’s minority ownership in printers and fabricators across the country allows control of lead time and pricing. This lower overhead cost gives us the flexibility to find the right production facility and supply chain for your project and gives you one point of contact, from design to installation. 


Jeff Lo is owner of TGS Elevate, a visual marketing / merchandising company that provides printing, point of purchase displays, and store fixture manufacturing, and in-store build outs for companies that have 50-500 locations nationwide.

Want to chat?


Get help from one of our professionals

Posted on Leave a comment

Franchise Fund (Golden State Warriors)

Franchise Fund

We’re excited to announce that Jeff Lo, president and owner of TGS Elevate, has been selected by the Golden State Warriors and United Airlines to join the 2023-24 cohort of the Franchise Fund!

Starting in 2021 in partnership with the The Golden State Warriors, United Airlines, and the Western Regional Minority Supplier Development Council (WRMSC), the Franchise Fund program was created to prepare small and medium sized businesses in the California Bay Area to do business with large corporations. 

The multi-month program includes a grant and scholarship for 25 business, culminating with a graduation at Chase Center in the spring of 2024

Franchise Fund


Jeff Lo is owner and president of TGS Elevate, a certified Minority Owned Company (MBE) that does the work of seven separate vendors – encompassing 2D and 3D design, printing, fabrication, project management, logistics and sourcing – to save clients time and money. TGSE’s minority ownership in printers and fabricators across the country allows control of lead time and pricing. This lower overhead cost gives us the flexibility to find the right production facility and supply chain for your project and gives you one point of contact, from design to installation. 


Jeff Lo is owner of TGS Elevate, a visual marketing / merchandising company that provides printing, point of purchase displays, and store fixture manufacturing, and in-store build outs for companies that have 50-500 locations nationwide.

Want to chat?


Get help from one of our professionals

Posted on Leave a comment

How to Design and Develop a Retail Space

Design and Develop

Designing a new retail space can be daunting. Many decisions made early on guide what is ultimately created in stores in the form of graphics and fixtures. Be aware of these early on in the process, or better yet, enlist professional support with a designer, architect or fabricator as you’re going through the process to ensure your final execution will hit your in-store experience and sales goals.

In this article, we’ll explore high level key elements in creating a retail space starting from scratch, describe the role of retail fixtures, and provide actionable take backs you can use immediately, regardless of where you are in the process.


Clear Brand Identity

Visual communication. This industry term describes the use of visual elements (graphics, fixtures, etc.) to convey a message. To be able to clearly communicate that message, you have to be crystal clear on what the message is. If you’re not clear on the what, the how (through design, graphics and fixtures) is going to be even less clear.

Avoid potential confusion or cognitive dissonance by starting with the brand. What’s at the heart of why the company does what it does? How is it communicated (core values, mission statement, colors, environmentally sustainable) in other channels (website, press releases)? What price point are you selling to (value, middle of the road, or upscale)?

Action items:

  • Know company core values
  • If you could pick only one thing – what should the brand be known for?
  • What price point are you selling to (good, better, or best)?


Know your customer

Clearly define who your customer is. Think about your best customer – what do they look like, what values are important to them personally, how frequently do they shop, how do they like to be interacted with (or not!) while they engage in your space? You’re their guide, and they’re the hero in the story of their shopping experience. What are their barriers, potential pitfalls, or if they don’t choose the right product to buy?

Next, hone in your messaging to speak to this customer. Be specific, give them a name, a life, a social structure, and be direct. Have fun with the process, sprinkle in items that are unique to the brand to build a lasting relationship with them that make your products and services irresistible. 

Action items:

  • Clearly define your customer
  • Refine your messaging to connect brand to customer
  • Understand the customer journey while in your space


Know your competition

Identify other brands or retailers that compete in your space. Use tools like LinkedIn’s Sales Navigator to select for geography, industry, size, etc. Then, go out and visit their stores. Take pictures, assemble a list of must haves and nice to haves that fit your company.

Take your partner with you, go separately and share notes after. Ask yourselves if things make sense, and point out changes you’d make for your store. Are there better ways you can connect your company and customers together than the competition? Identify those areas and make them clear messaging points for the future.

Action items:

  • Identify competitors
  • Visit / audit competitors
  • Question and revise your brand and messaging


Know the space

Interesting that this is the fourth step in the process, isn’t it? To us, starting with the target and working backwards gives us the best chance of hitting it. If you start with the space first without knowing your brand, it’s a less direct path to success, a time and cost killer.

The space itself is also crucially important – of course. Who are your neighbors, what do they sell and to who? Where are you located relative to the traffic flow? Do you have a design committee or landlord that also needs to sign off on your store? Generally, how does your ideal customer interact and move through the space most effectively?

Now might also be a good time to engage professional support. Architects like WDA specialize in retail build outs and can help shorten your learning curve in navigating this process. Rather than going it alone, enlist the help of someone that knows the ropes – they can save you time and money.

Action items:

  • Locate your space
  • Discover all decision makers in the store setup process
  • Know your potential neighbors, their products, price points, and customers
  • Consider professional support


Create a floorplan

It’s time to put pen to paper for your space. From a bird’s eye view, place the critical points of the transaction (fitting room for apparel companies, checkout counter for all). I like to use graph paper and cut out little pieces of paper representing product groups – at scale. Have fun with it, don’t hold back on ideas, and take pictures as you go. Don’t overthink it, once you have something that seems like a good starting point, it’s time to move on.

Like anything else, store development is a process. If you limit that process, you end up taking more time and energy along the way. Take the direct route, use the 80/20 rule, and keep the line moving.

Action items:

  • Create a scale bird’s eye view floor plan
  • Place products in the space
  • Identify and place the critical transaction points


Create a planogram

Now it’s time to grow your store – vertically. Take each wall and map out how the fixtures, products, and focal points layout in an elevation. Go back to trusty graph paper, enlist the aforementioned architect, or learn SketchUp – there’s no hard and fast rule on how to do this best.

Once completed for each wall, take careful consideration of how visually “busy” it is and match it back to your brand so it’s still communicating the same message. Where might people want to commonly navigate (bathroom), how can they find it (signage), and what’s required by law (ADA)? We’re still creating empty containers at this point for fixtures mind you – so don’t get too specific on what it looks like, only where it goes, and what products are where.

Action items:

  • Create a planogram
  • Understand legal requirements for access, spacing and signage
  • Revise, revise, revise


Match design and materials

Taking in the brand, customer, competition, space, messaging, and market fit, identify materials that do the communicating for you. For example, a spa is a calming space. Complement it with neutral colors, subtle textures, and simple design elements. Referring back to your planogram, what would make the products sell best? Light or dark? Wood, metal, acrylic, graphics, or something else?

Once you have the general look, research how it can be best produced in the space with cost effective materials and fabrication methods. Now is also a great time to engage with your fixture manufacturer(s). Your fixture will be limited to each’s supply chain, equipment, techniques, and know how. Or engage with a company like ours that owns minority shares in fabrication companies throughout the country to do the heavy lifting for you. Get an idea of how they’re positioned in the market (cost, timeline, clients) to see if they’re a good fit.

Action items: 

  • Pick colors and materials that bridge brand, products, and customer
  • Engage with multiple fixture fabricators
  • Review supply chain output and timelines


Samples and prototypes

Pick one or a few materials, get samples, decide on a fabricator, and go and make the thing! Rely back on your architect or the fixture fabricator for shop drawings to ensure everyone is on the same page. Identify how these transport to stores and install – who and how. Ensure it’s part of the design.

If you’re looking to be cost effective, treat the level of quality as a first article instead. Take extra time to hone in the fixture, get pictures from the shop before they ship, revise in the plant as needed, then set up and try it out in the store. Put it through the paces – simulate customer and store employee interaction with bumps, hits, and moisture. After all, these are supposed to last five years, if there’s a design flaw, better to uncover it now vs. later.

Action items:

  • Get samples
  • Create a prototype
  • Test it out


Revise and rollout

The work is done! Repeat the fabrication process until it’s ready for production. Include instruction sheets and required tools, ensure they match what you’re able to provide at the store level, and get pictures after setup for final approval.

Like art, developing a store can be something that is never finished. Understand the iterative process related to this, take in information from trends and at the store level, for constant improvement. 

Action items:

  • Approve cost and production timeline
  • Setup in stores
  • Keep records of shop drawings for reference


Jeff Lo is owner and president of TGS Elevate, a certified Minority Owned Company (MBE) that does the work of seven separate vendors – encompassing 2D and 3D design, printing, fabrication, project management, logistics and sourcing – to save clients time and money. TGSE’s minority ownership in printers and fabricators across the country allows control of lead time and pricing. This lower overhead cost gives us the flexibility to find the right production facility and supply chain for your project and gives you one point of contact, from design to installation. 


Jeff Lo is owner of TGS Elevate, a visual marketing / merchandising company that provides printing, point of purchase displays, and store fixture manufacturing, and in-store build outs for companies that have 50-500 locations nationwide.

Want to chat?


Get help from one of our professionals

Posted on Leave a comment

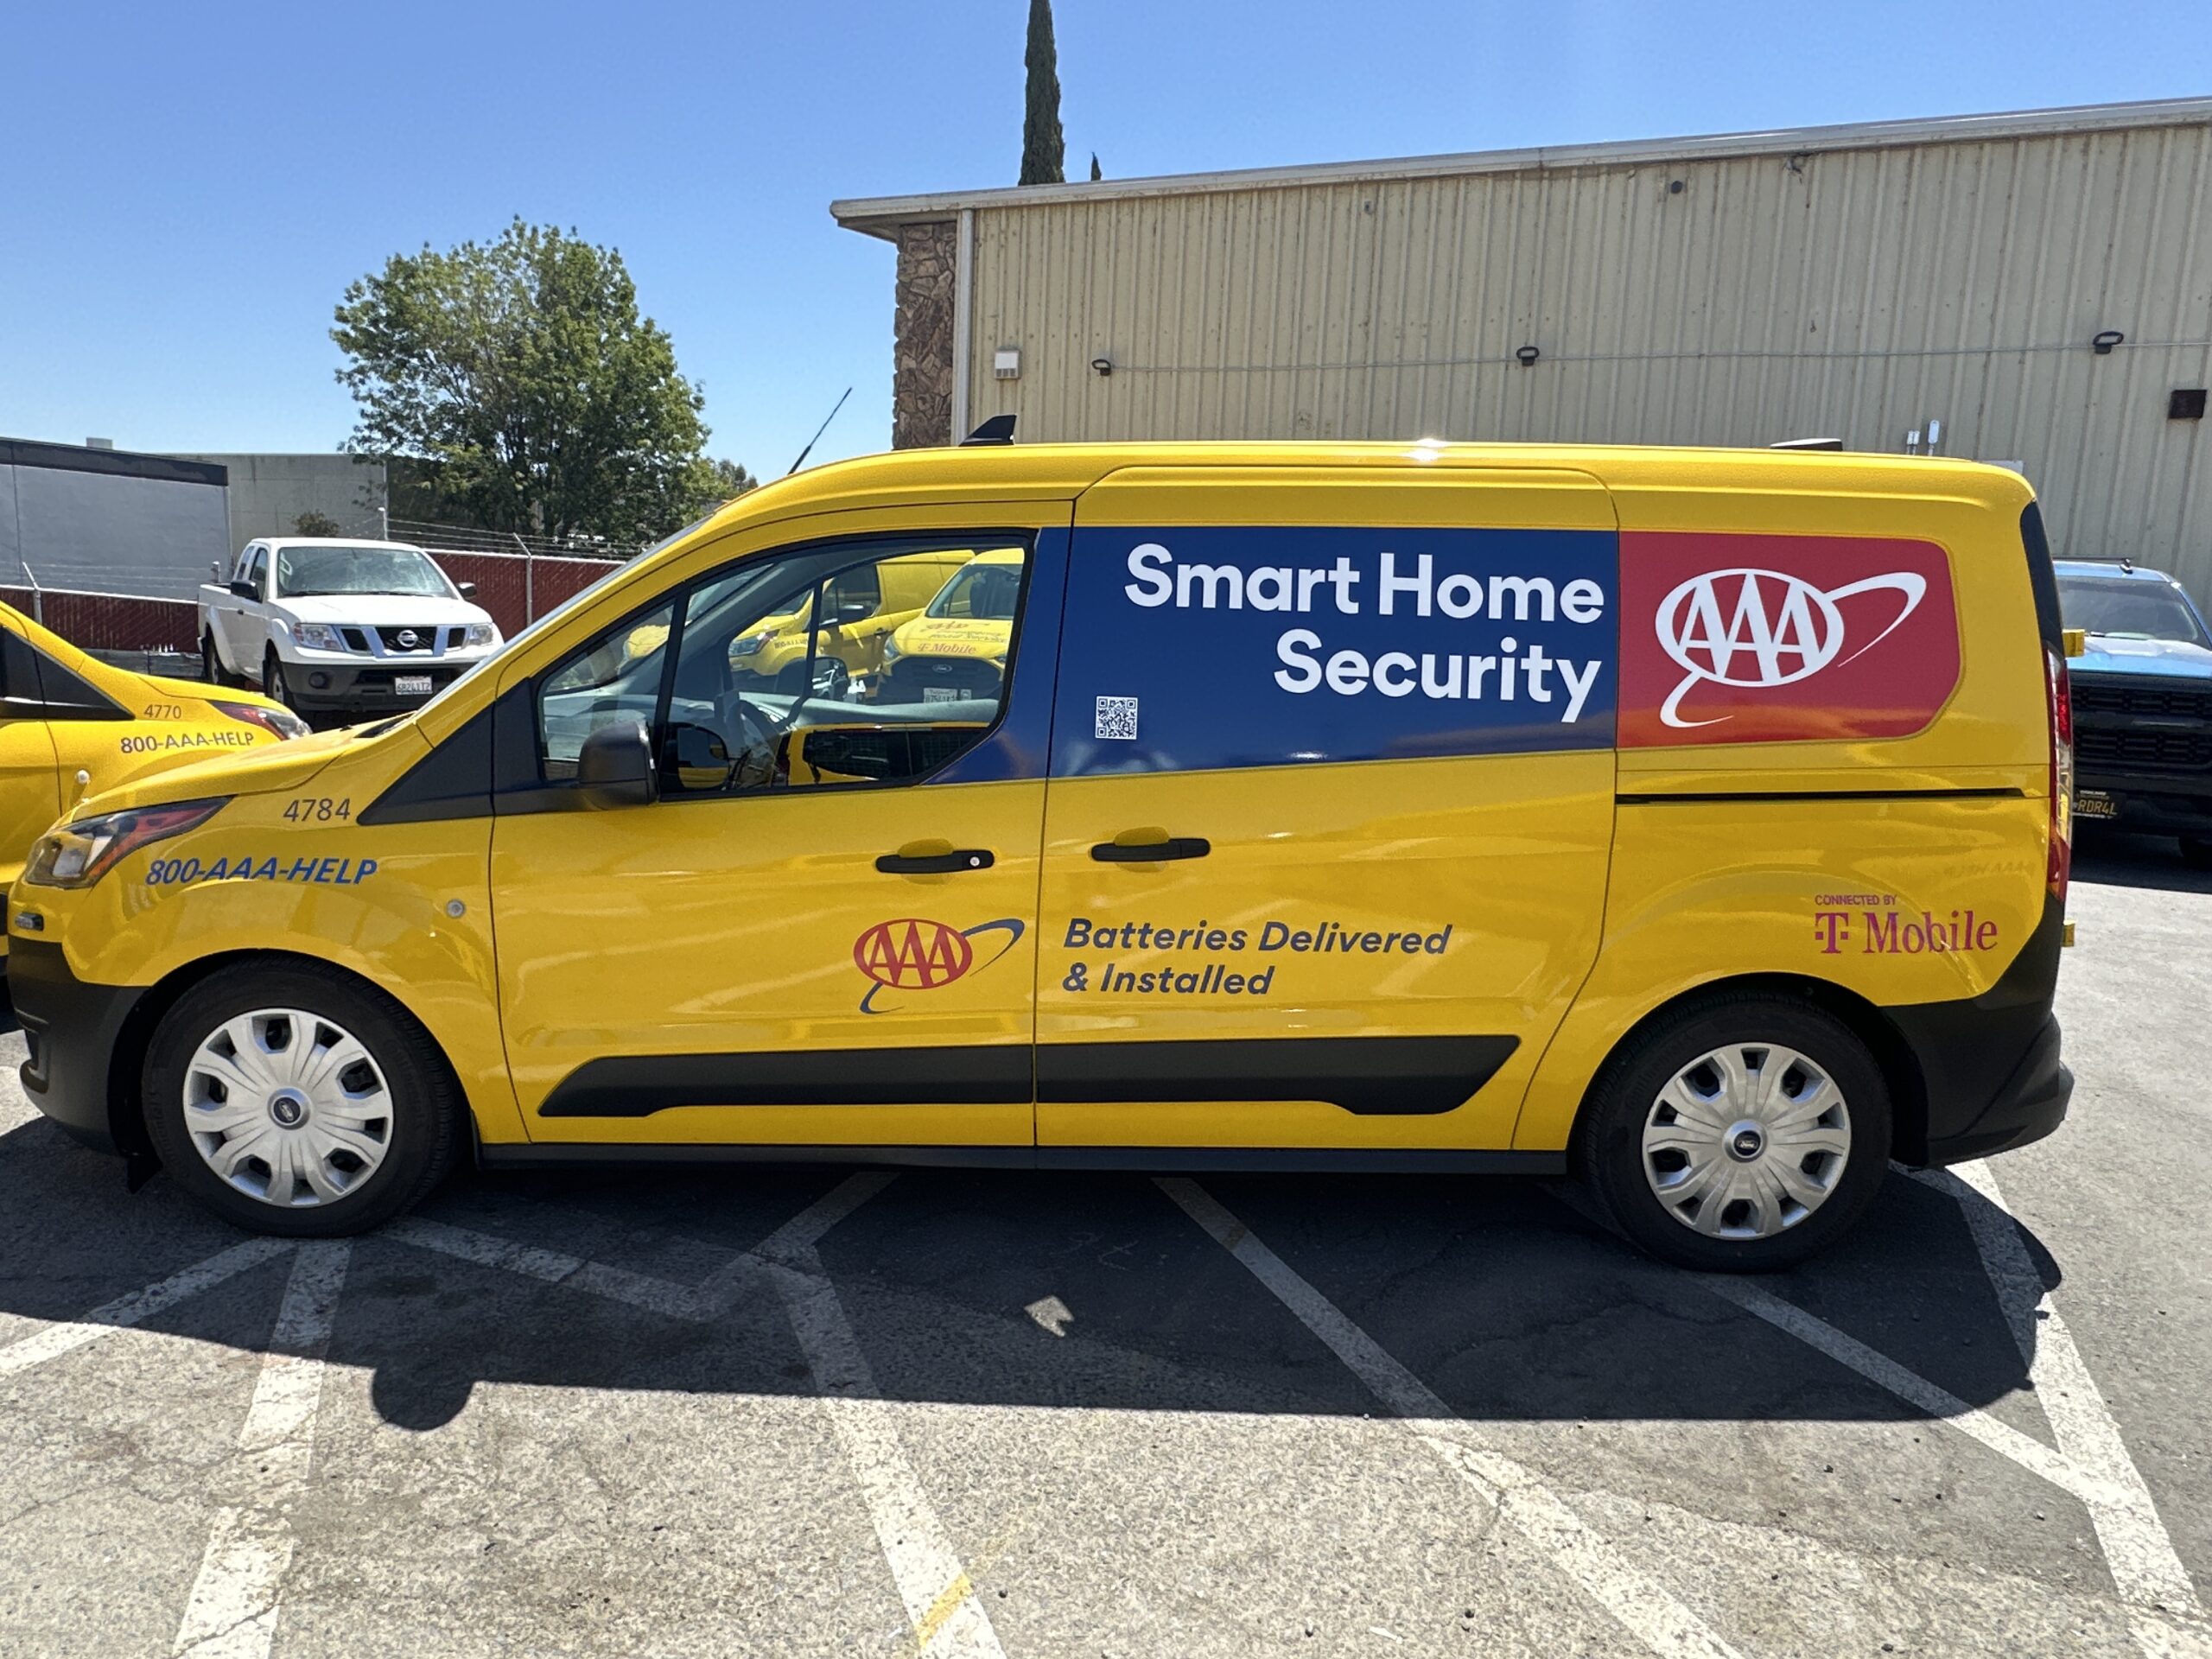
How we innovate: we created a Custom Database to streamline a 300-vehicle wrap project for AAA and T-Mobile

Custom database

AAA recently announced T-Mobile as their Exclusive Wireless Partner, providing the communication backbone for their legendary roadside service. In addition to announcing this partnership through broadcast advertising, they also wanted to get the word out on the street…literally. 

Rather than track it all manually with spreadsheets, we built a simple custom database with two modules: a vehicle list, and an install list. It allowed our installers to upload photos, all teams to receive an automated email with PDF of each completed install, and clients to digest our progress with a simple dashboard. For a deeper dive, read on!


The Project

Custom printed, co-branded, full vehicle wraps on over 300 of AAA’s Emergency Road Service (ERS) vans located across multiple states.


The Problem 

(among the logistical challenge of taking multiple support vehicles offline while still supporting outstanding roadside support): how to efficiently track the many details and moving parts of the install, while keeping multiple teams updated on progress


The Traditional Method – Spreadsheets

Spreadsheets, photos, filing in nested shared folders, and emails. Lots of emails. Oh and a full time person tracking everything. It seems laughable, but the tried and true method to connect final install photos with a completed van wrap is for the installer to write the vehicle identification number (VIN) on a post-it note and hold it up in one of the photos. And God be my strength if I see another blurry or out of focus photo written in hieroglyphics and have to track down the installer who has already left the site to go back and take another photo while staying on the original timeline!! Deep breaths…whew, sorry, slipped into the red mist for a second there, I’m good now. Kidding aside, as messy as it may be, that might work fine for one or a few installs. But ramp that up into the literal hundreds and you’ve got a mess on your hands.


Meet the hero: The Custom Database

First off, what is a database? In the words of Chat-GPT, it’s: like a big toy box, and inside this box, you have smaller boxes. Each smaller box, like a table in a database, holds different types of toys or data. Like being able to quickly find a toy in its specific small box, databases let us quickly find the information we need in its specific table. So, a database is basically a big, organized toy box for storing and finding information! 


What did we do? 

Technically, we created two custom forms, one to track the entire fleet of ERS vehicles, and the other to track the photos from the install. A VIN number connects the two forms, so we are able to create any report of the two related tables.


How does it work? 

We uploaded a list of ERS vehicles, then sent a link out to each of our installers. When on site, the installer uses a link on their phone (it’s web-based, so no logins or app required), select the vehicle from the dropdown, then install five photos: the VIN closeup, then front, back, left and right. Once they hit upload, a confirmation email is sent to all teams, with photos, VIN field (to cross check) and installation time included. This builds the records on our database, where we can see them in real time in a report, and view the images in line with the data. Our dashboard shows how many vehicles were done, how many remain, and can drill down to which geographic area. No project time needed, manual emails, or digging through folders. All the data is in one place, is updated in real time, and accessible to all.


What’s the take away? 

Custom databases can do a lot. In this example, we used it to automate the install validation and management process. However, it can be used to track pretty much anything. Whenever you’re using an important spreadsheet, and think of the versions, corrections, and reports needed from it and think that there’s got to be a better way to do it, it’s definitely time to check out a custom database.


Jeff Lo is owner of TGS Elevate, a visual marketing / merchandising company that provides printing, point of purchase displays, and store fixture manufacturing, and in-store build outs for companies that have 50-500 locations nationwide.

Want to chat?


Get help from one of our professionals

Posted on Leave a comment

How a Custom Database can help you manage a big project

Database

Are you tired of the struggle of using spreadsheets to manage complex projects? Does the constant juggle between shared drives, texting, and spreadsheets make you feel more like a secretary than a project manager? Fear not, as there is a game-changing solution that can revolutionize the way you handle such projects – a custom database.

Imagine managing a project of installing window graphics at 250 nationwide locations: final install photos would come in via email and texts from dozens of installers and you’d match each one to a specific location. God forbid one wasn’t done correctly, and if so, you’d have to manage a go-back as well. The lack of a single location for all project information (install date would be in a spreadsheet, and photos stored elsewhere) and the absence of real-time updates (ex: how many locations are done and those that remain) add unnecessary complexities.

Enter the Custom Database

A custom database is the answer to your project management woes. It acts as a centralized hub, streamlining your workflow, and providing an array of benefits that can transform the way you handle big projects.


1. Centralized Data Management:

Say goodbye to scattered information across various platforms. A custom database offers a single, unified location to store all relevant project data. From the list of install locations to installer details and progress updates – everything is easily accessible to all team members in real-time.


2. Streamlined Photo Management:

Manual matching is no longer a headache and a job within itself.  With a custom database, installers upload images directly into the system, linking them to the location selected from a drop down list. Once saved, the images all show up so you can see them all together, and your dashboard updates with what is done and what is left to do. This seamless process ensures that you have a comprehensive visual record for each location and can focus on higher level tasks to ensure the project is a success.


3. Real-Time Updates:

Gone are the days of outdated spreadsheets and delayed communication. A custom database provides real-time updates, ensuring that every team member is on the same page. Stay informed about completed installations, upcoming tasks, and any changes to the project, all in real-time. 


4. Effortless Coordination:

Coordinating tasks and updates becomes a breeze with a custom database. Instead of relying on scattered texting and chatting, team members can communicate seamlessly within the platform. This boosts efficiency, minimizes misunderstandings, and saves valuable time.


5. Automated Confirmations:

No more manual follow-ups for confirmation. A custom database can automate confirmation emails once an installer completes a task. This feature not only acknowledges the hard work of your team but also ensures that you can easily track progress and maintain accountability.


The happy ending

Effectively managing large-scale projects across multiple installation sites no longer needs to be a daunting endeavor. Embracing the capabilities of a tailored database solution can significantly enhance your workflow, foster improved collaboration, and ultimately lead to greater project success. With centralized data management, real-time updates, and automated confirmations, a custom database empowers your team to operate with greater intelligence and efficiency.

It is time to break free from the challenges posed by unwieldy processes and fragmented information. Elevate your project management capabilities by adopting a custom database, and witness your major projects flourish like never before. Embrace the future of project management and experience the transformative difference it can make today.


Jeff Lo is owner of TGS Elevate, a visual marketing / merchandising company that provides printing, point of purchase displays, and store fixture manufacturing, and in-store build outs for companies that have 50-500 locations nationwide.

Want to chat?


Get help from one of our professionals
Posted on Leave a comment

3 Powerful Steps to Boost Sales for Your Up-and-Coming Brand

Brand

Are you a new, exciting, and up-and-coming brand looking to take things to the next level? Great! To make sure you don’t take one step forward and two steps back, ensure a strong foothold in your messaging, market channel(s), and target demographics before you take that leap. In this article, we will explore three key steps you can take today to increase sales and take your brand to new heights.

1. Define Your Ideal Customer Profile (ICP)

Understanding your target audience is the foundation of any successful marketing and sales strategy. Without a clear picture of who your ideal customers are, you risk wasting resources on ineffective marketing campaigns and missing out on potential sales opportunities.

To define your ideal customer profile, follow these steps:

Demographics

Identify key demographic factors such as age, gender, location, occupation, and income level that align with your product or service. Be as specific as you can – we’ve seen companies be so specific they made up names and stories of their prospect’s daily lives!

Psychographics

Dive deeper into your customers’ values, interests, lifestyles, and pain points. Nothing exists in a vacuum and there are synergies everywhere. Take advantage of this to create a framework and develop multiple points of attraction for them to come to you.

Behavioral Patterns

Analyze your customers’ purchasing behavior, online activities, and engagement with your brand. This data will help you craft targeted marketing campaigns that address their specific needs.

Use the data above to create a few profiles for who these ICP’s are, you’re ready to speak to their values and must haves with a compelling Unique Selling Proposition.

2. Be Clear on Your Unique Sales Proposition

In today’s competitive market, standing out from the crowd is essential for your brand’s success. To achieve this, you must have a clear and compelling Unique Sales Proposition (USP). Your USP is what sets you apart from your competitors and gives your customers a reason to choose your brand over others.

To create a powerful USP, consider the following:

Identify Your Unique Value

Pinpoint what makes your brand special and valuable to your customers. It could be a unique product feature, exceptional customer service, sustainable practices, or a combination of factors.

Address Customer Pain Points

This is the most straightforward starting point for most. First understand the challenges your target audience faces with existing market options and position your brand as the solution. Tired of getting sunburn because you can’t see where you applied sunscreen? Then try ours with zinc that adds a white tint so you’ve left nothing up to chance. Or, tired of sugary kids drinks at restaurants? Try our all-natural root beer with 50% the sugar. Demonstrating how your product or service can make their lives better will resonate with potential customers.

Craft a Memorable Message

Condense your USP into a concise and memorable statement that clearly communicates the benefits of choosing your brand. A strong USP should evoke emotion and leave a lasting impression. Tag lines, a jingle, humor – there are a lot of tools you can use – just make sure they don’t get in the way of the message, and stick the landing!

Once you have a compelling USP, integrate it into your marketing materials, website, social media, and sales pitches. Consistency is key to ensuring your message reaches your audience effectively.

3. Strategic Partnerships

Collaborating with other non-competing, correlated businesses with a strategic partnership can serve as another channel for your leads and sales. Seek out partnerships that complement your products or services and align with your brand values. Strategic partnerships offer several advantages:

Access to a New Audience

Partnering with a well-established brand allows you to tap into their existing customer base and introduce your products or services to a wider audience.

Credibility and Trust

Associating with reputable businesses enhances your brand’s credibility and instills trust in potential customers.

Shared Resources

Collaborating with a partner can lead to shared resources, cost-sharing opportunities, and access to expertise that can drive innovation and growth.

Remember that successful partnerships are mutually beneficial, so be sure to offer value to your partners in return.


Increasing sales for your up-and-coming brand requires a strategic approach. Start by defining your ideal customer profile, allowing you to tailor your marketing efforts effectively. Craft a compelling Unique Sales Proposition to stand out from the competition and communicate your brand’s value clearly. 

Explore strategic partnerships to expand your reach and tap into new opportunities. By implementing these three essential steps, you’ll be on your way to achieving remarkable sales growth and establishing your brand as a force to be reckoned with in the market.


Jeff Lo is owner of TGS Elevate, a visual marketing / merchandising company that provides printing, point of purchase displays, and store fixture manufacturing, and in-store build outs for companies that have 50-500 locations nationwide.

Want to chat?


Get help from one of our professionals

Posted on Leave a comment

Meeting the Challenge: Designing, Prototyping, Producing, and Delivering 500 Custom Point of Purchase Displays to 80 locations in 14 states in Under 60 Days

POP Display

Launching a new product is always exciting for any business, and  it also comes with its fair share of challenges. Recently, we had a custom point of purchase (POP) display project that was no different. Our client had a tight deadline to deliver over five hundred custom POP displays to 80 different locations across 14 states to mesh with their highly anticipated product launches. We were, of course, happy to take on the challenge! 

The Problem: A Race Against Time

As the go-to point of purchase display manufacturer for Fortune 500-1,000 brands and retailers for nearly thirty years, we are accustomed to meeting tight deadlines. However, producing a final product is one thing, while developing and testing it from scratch then rushing to produce it en masse is something different altogether. The clock was ticking, and we needed a robust solution to fulfill our client’s requirements effectively.

The Solution: Precision and Coordination

1.Rapid Artwork Update: Caught during proofing, we identified color and copy issues within the artwork. Rather than send it back to the client for revision and risk losing more time, we coordinated with our client and our design team sprung into action to make the change. After carefully reviewing the artwork for other possible issues, we promptly updated the art files and sent them back for re-approval. What could have taken a week as done in hours.

2. Streamlined Production Process: To meet the ambitious production deadline, we started production with the POP displays that were not affected by the art changes. This saved the client rush fees and possible lost time. By optimizing our modular post-production finishing section to complete these first units while also setting tooling for the displays to follow, it didn’t disrupt our other projects going through the shop, or cause trouble when the other units caught up.

3. Shipping optimization: To make up for lost time, we ran the distro through our software to see which shipping points would take the longest, and started with those first. We found that while 80% of the locations would receive shipments in 3 days going ground speed (thanks to our centrally located facility in the MidWest) we could pick up production time by sending the farthest points first. We did this all on our end without prompting so our client didn’t have to lift a finger, worry about the specifics, or pay any more in shipping.

The Outcome: Mission Accomplished

Thanks to our team’s attention to detail, urgency, and problem solving we were able to meet the deadline, provide solutions, and create more ease for our client. All POP displays arrived in time for the product launch, impressing the internal stakeholders higher up in the organization.

Post Mortem: Navigating Challenges, Delivering Excellence

This project was valuable for our client to experience – meeting deadlines and budgets, providing solutions, and making the overall process easier and more reliable. 

At TGS Elevate, we take pride in turning challenges into opportunities and delivering outstanding results for our clients. As we continue to grow, we know we don’t know everything, and that continuous training and revisions are part of the process. Driven by urgency and perseverance (two of our company core values), we are committed to providing innovative solutions and exceptional service to our clients for years to come.


Jeff Lo is owner of TGS Elevate, a visual marketing / merchandising company that provides printing, point of purchase displays, and store fixture manufacturing, and in-store build outs for companies that have 50-500 locations nationwide.

Want to chat?


Get help from one of our professionals